

One of the most valuable assets you can add to your business is a recurring revenue or subscription component.
A recurring revenue stream gives you financial security & cash flow and can increase the value of your business if you ever wanted to sell it in the future.
In the past, setting up recurring payments on your website was quite a headache.
You’d need some combination of WooCommerce and (in my opinion) their expensive WooCommerce Subscriptions add-on.
That tech setup is a bit of an overkill for Content Creator Experts businesses (e.g. Consultants, Coaches, Instructors, Authors, etc).
How to Setup Your Recurring Payments Quickly & Easily
As mentioned, for most Content Creator-type businesses, using WooCommerce might be overkill and also more bloated than what you need to start taking payments.
Most Creator-type businesses offer services & products such as (but not limited to):
- Digital products (e.g. ebooks, templates, etc)
- Monthly coaching program
- Memberships
- Online courses (either one-time payments or recurring payments)
- Monthly paid newsletters (both digital or print)
I’ll show you how to easily setup recurring payments without the need for WooCommerce.
Let’s go!
What You Need
I am assuming you’re using WordPress for your website, so what I’m using here is a WordPress plugin:
- Fluent Forms Pro (this is a paid plugin for WordPress which adds the payment features to their free Fluent Forms plugin, you cannot do this with only the free version) *If you get Fluent Forms Pro from my link, it includes an exclusive 20% discount!
- Either a Stripe or Paypal account (the payment function also supports some other payment providers, but these are the two most common methods you’ll likely use).
Step 1: Install the Free Fluent Forms Plugin
In order to use the Pro (paid) plugin, you’ll need to install the free Fluent Forms plugin first.
Step 2: Install the Fluent Forms Pro plugin
If you haven’t already, go and purchase the Fluent Forms Pro plugin (you get a 20% discount if you purchase from my link).
Step 3: Activate & Configure the Payments Module in Fluent Forms
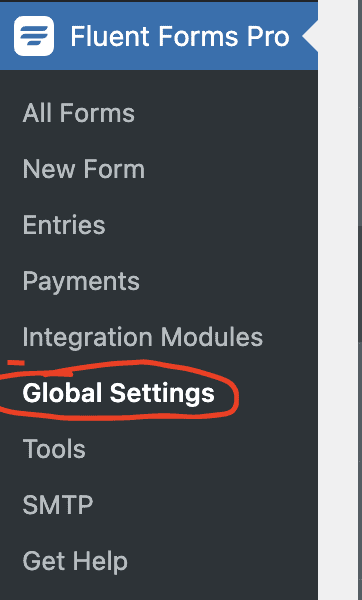
Under the Fluent Forms navigation menu (on the left), go to “Global Settings”.
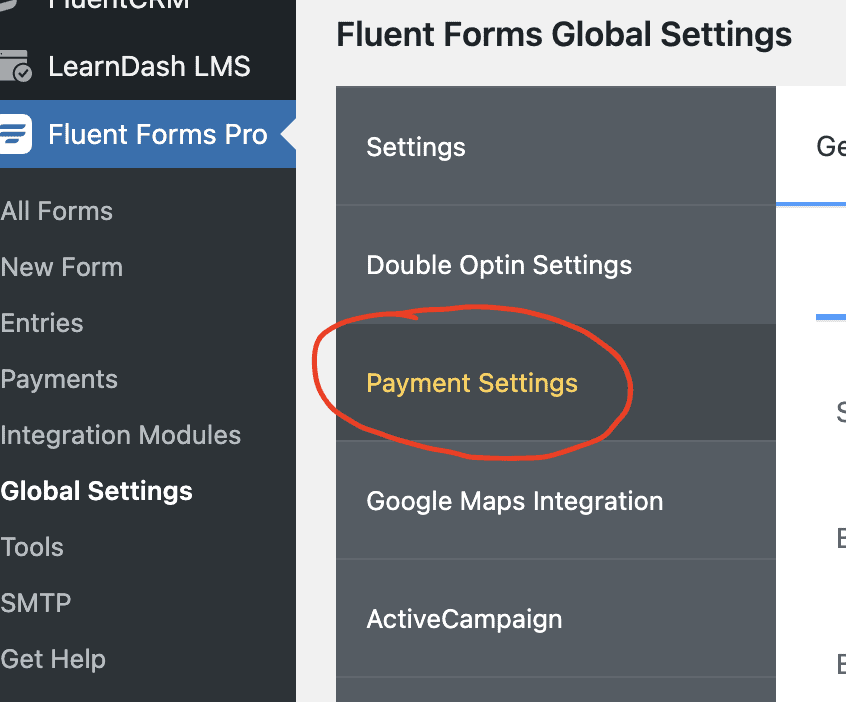
Under “Global Settings” menu, go to “Payment Settings”
Enable the Payment Settings in Fluent Forms by checking the box:
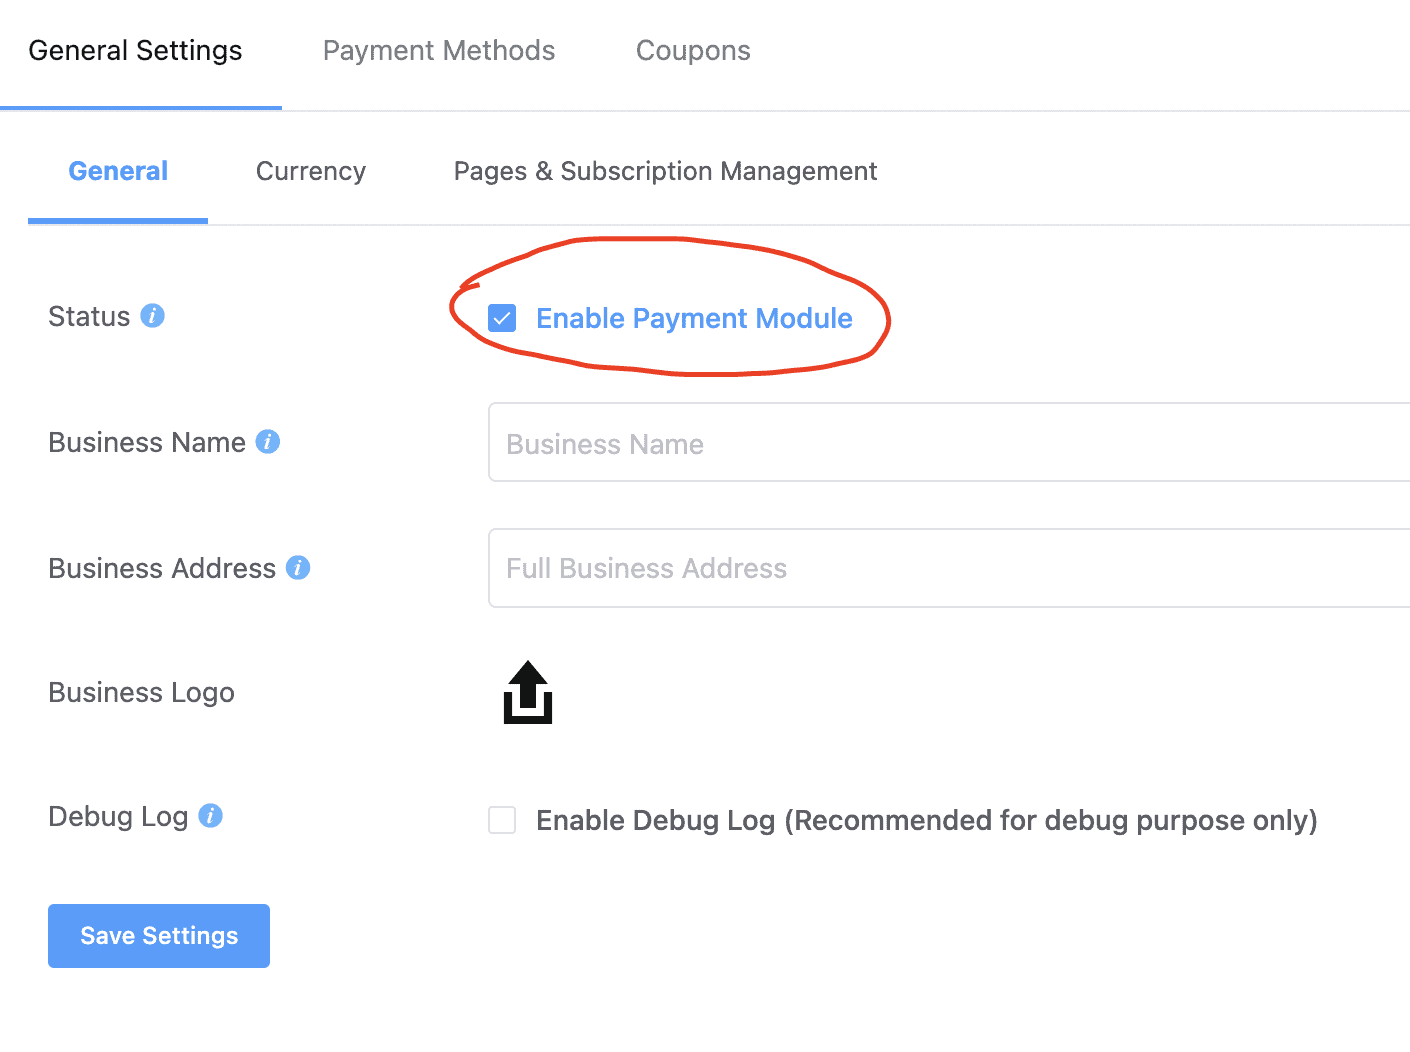
Enter your details in the “Business Name” and “Business Address” fields.
Upload your logo so it appears on the checkout areas.
Click on the “Save Settings” button to save your changes.
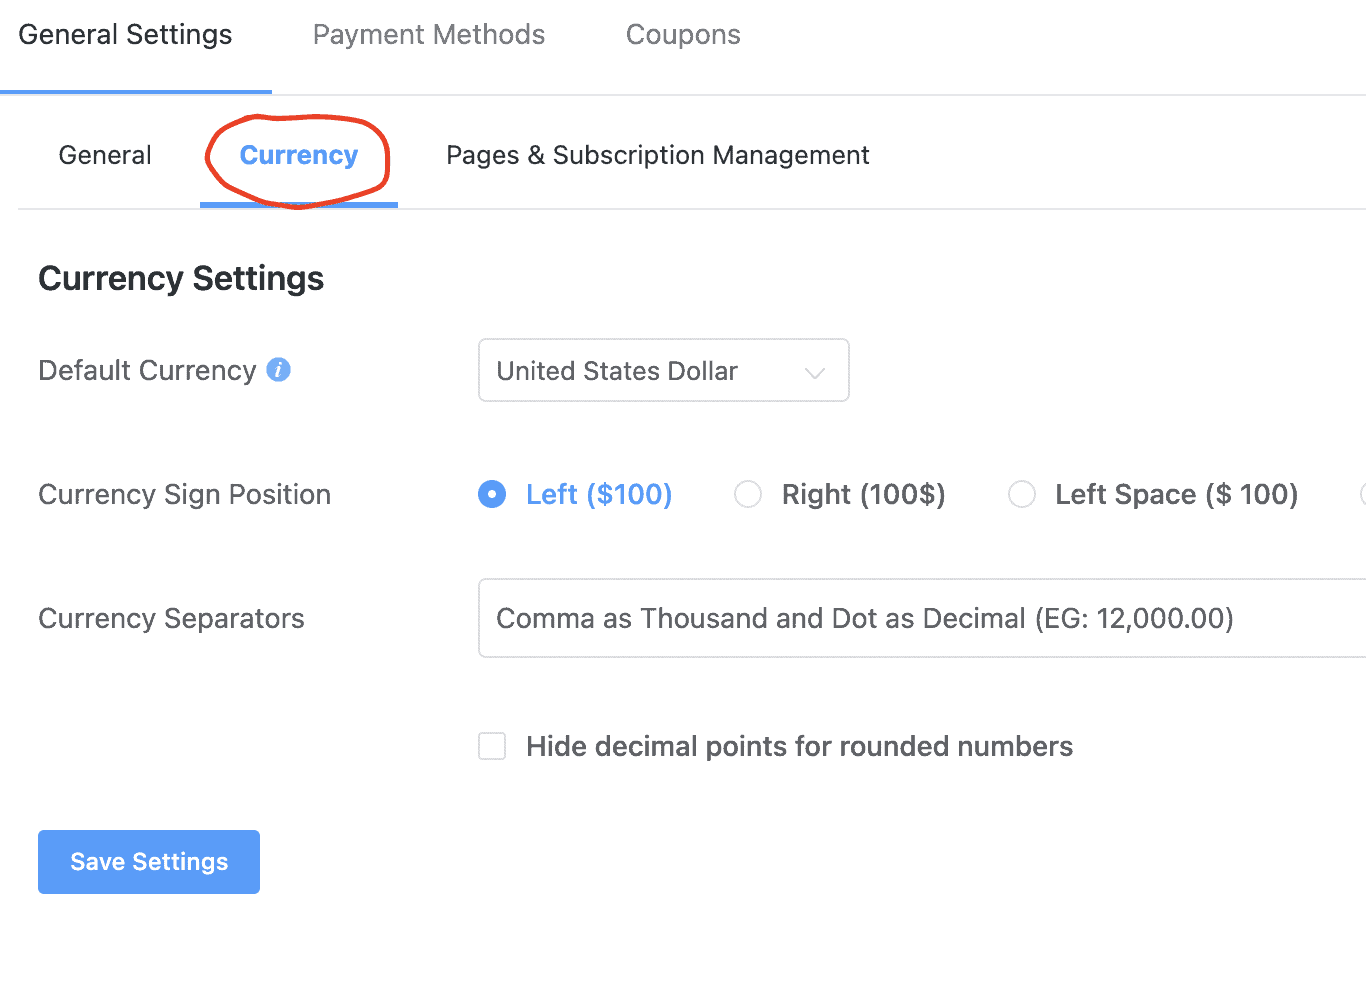
Next, click on the “Currency” tab and configure the currency you’ll be charging:
Next, activate and configure your selected payment methods. In this example, I’m using Stripe:
Click on the “Payment Methods” tab => Under “Stripe”, check the box “Enable Stripe Payment Method”
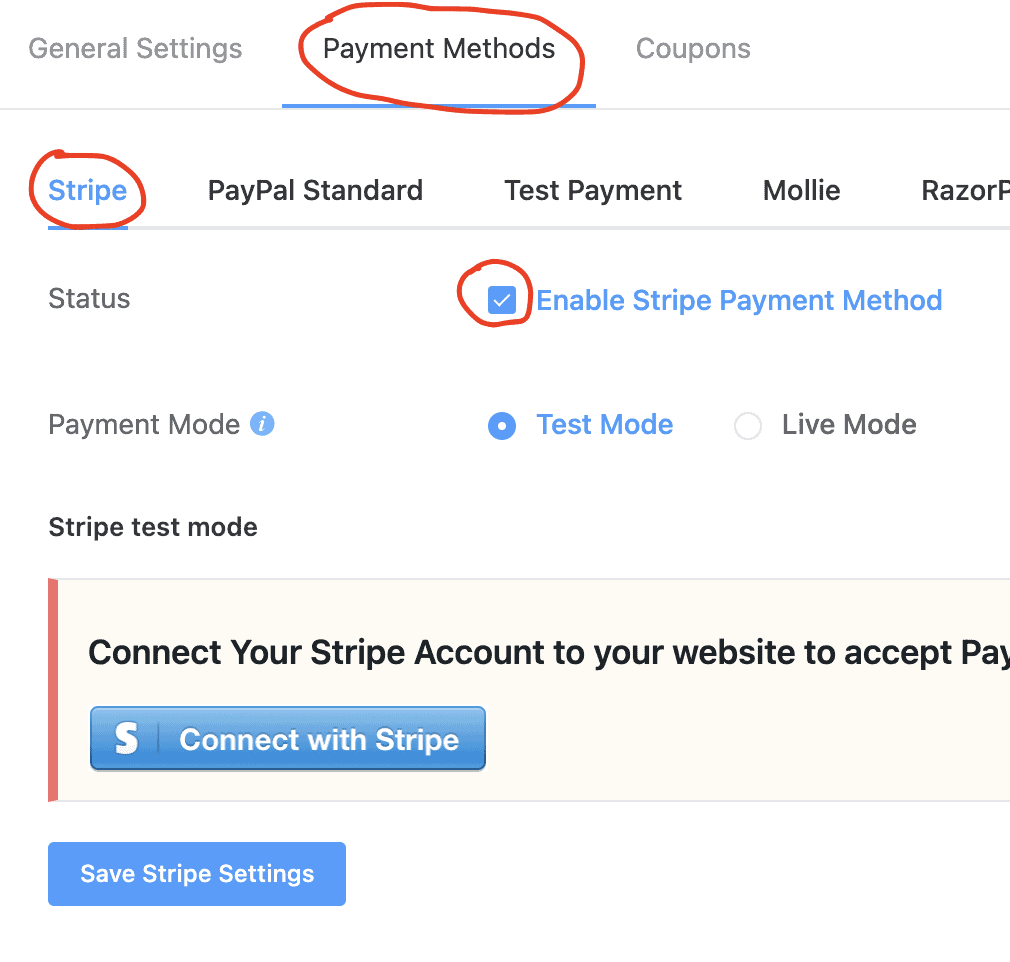
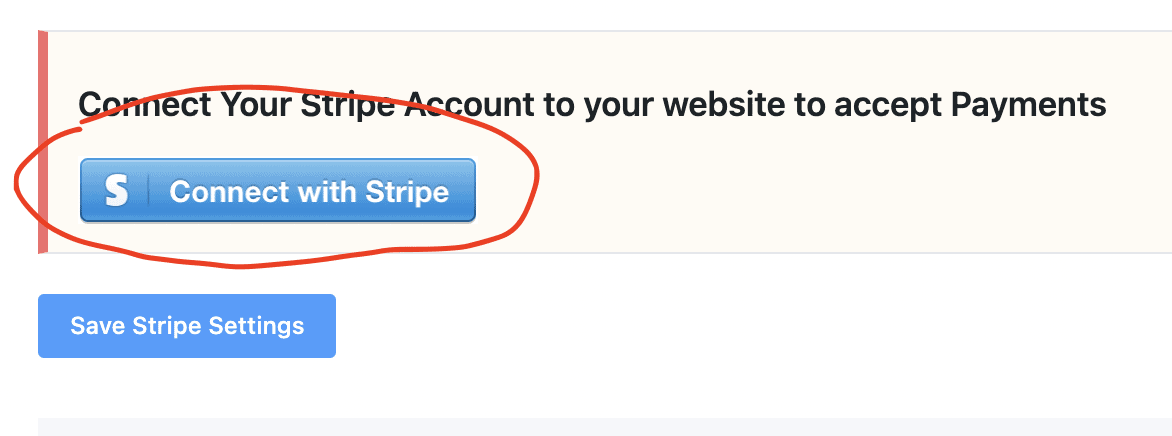
Next, connect your Stripe connect to Fluent Forms:
Click on the “Connect with Stripe” button and you’ll be prompted to enter your Stripe login details to connect your Stripe account to Fluent Forms.
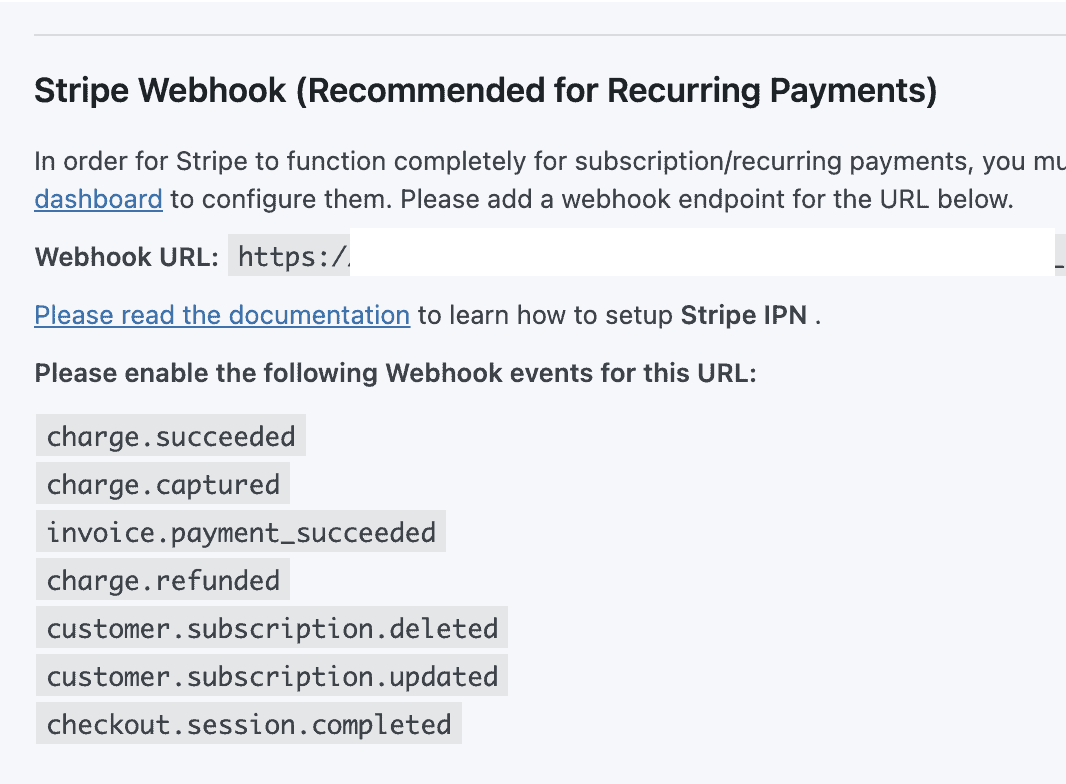
IMPORTANT STEP: this next step is important to configuring your Stripe payments, it might feel a little “techie” for some but it’s not too difficult, just follow the instructions slowly and carefully:
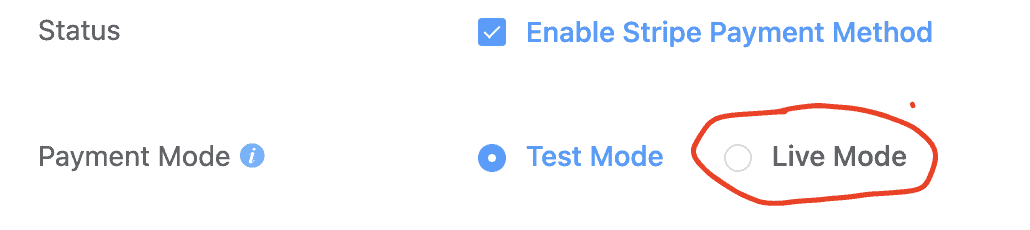
Once you have connected your Stripe account and completed the above setup and you are ready to start taking “live” payments, ensure you change the Stripe settings from “Test” mode to “Live”:
Step 4: Creating Your Recurring Payment Form
Congrats! If you made it this far, you’ve gotten past the more difficult part.
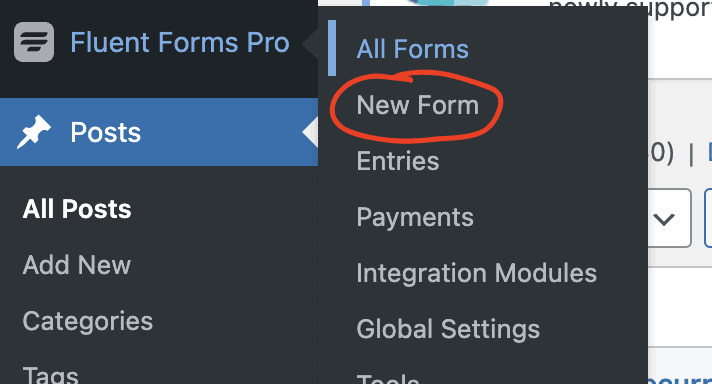
Under the Fluent Forms Pro navigation menu, “Add a new form”
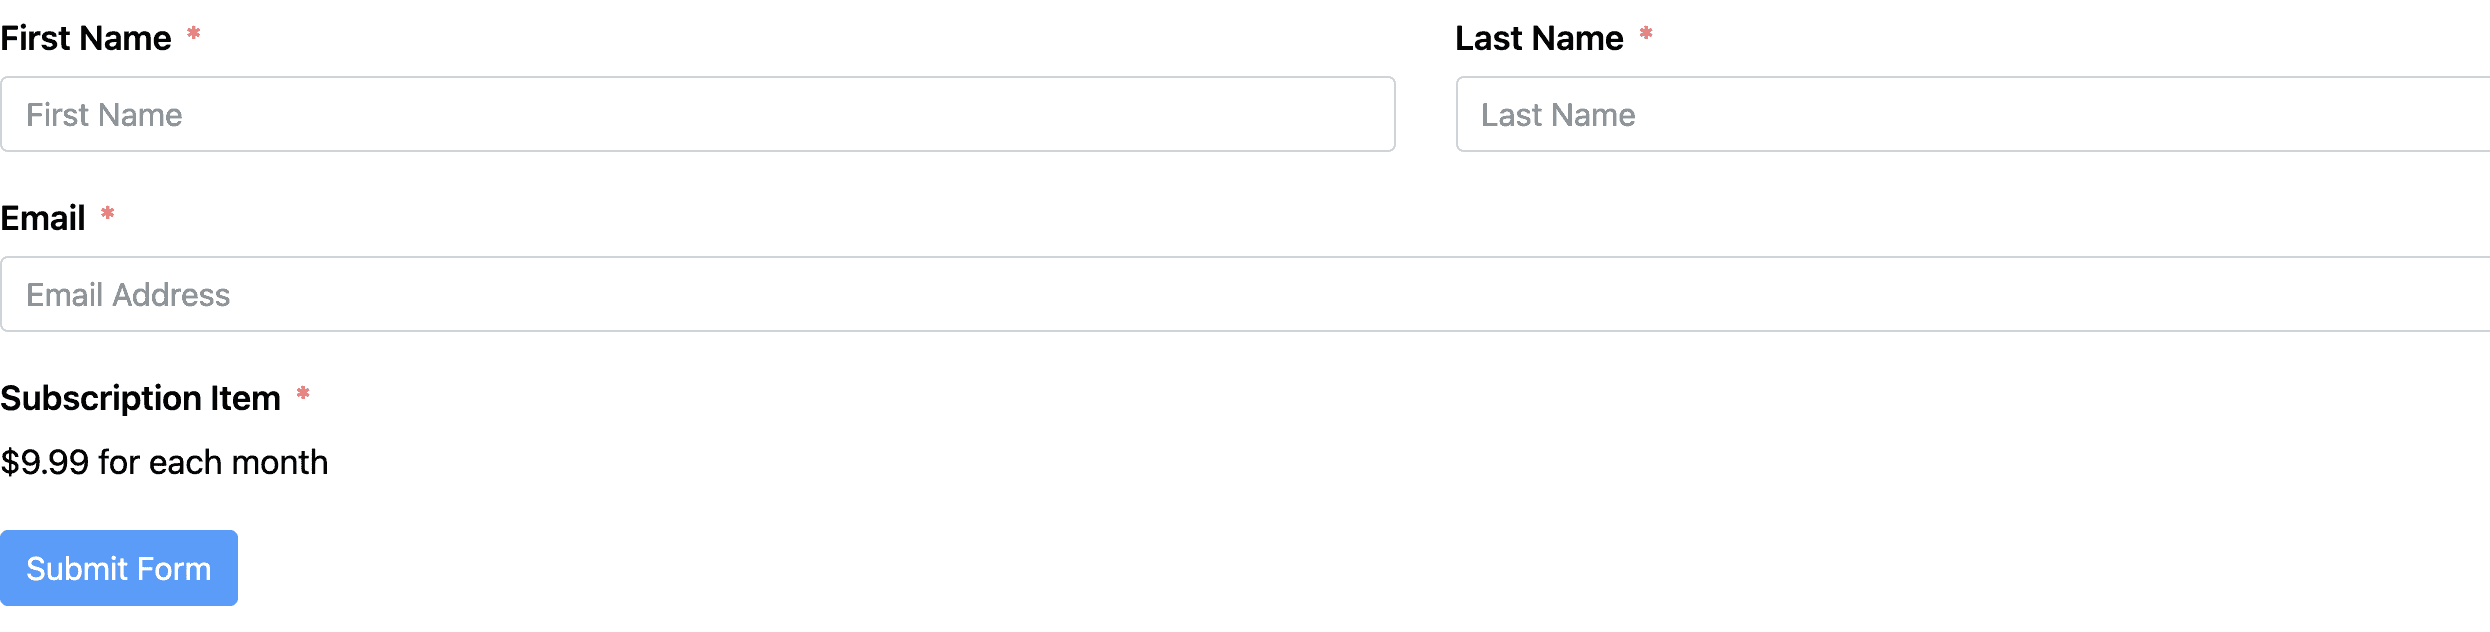
Next, add the relevant fields of information you want to collect in your payment form. We’ll keep it simple in this example by including only: Firstname, Lastname, Email.
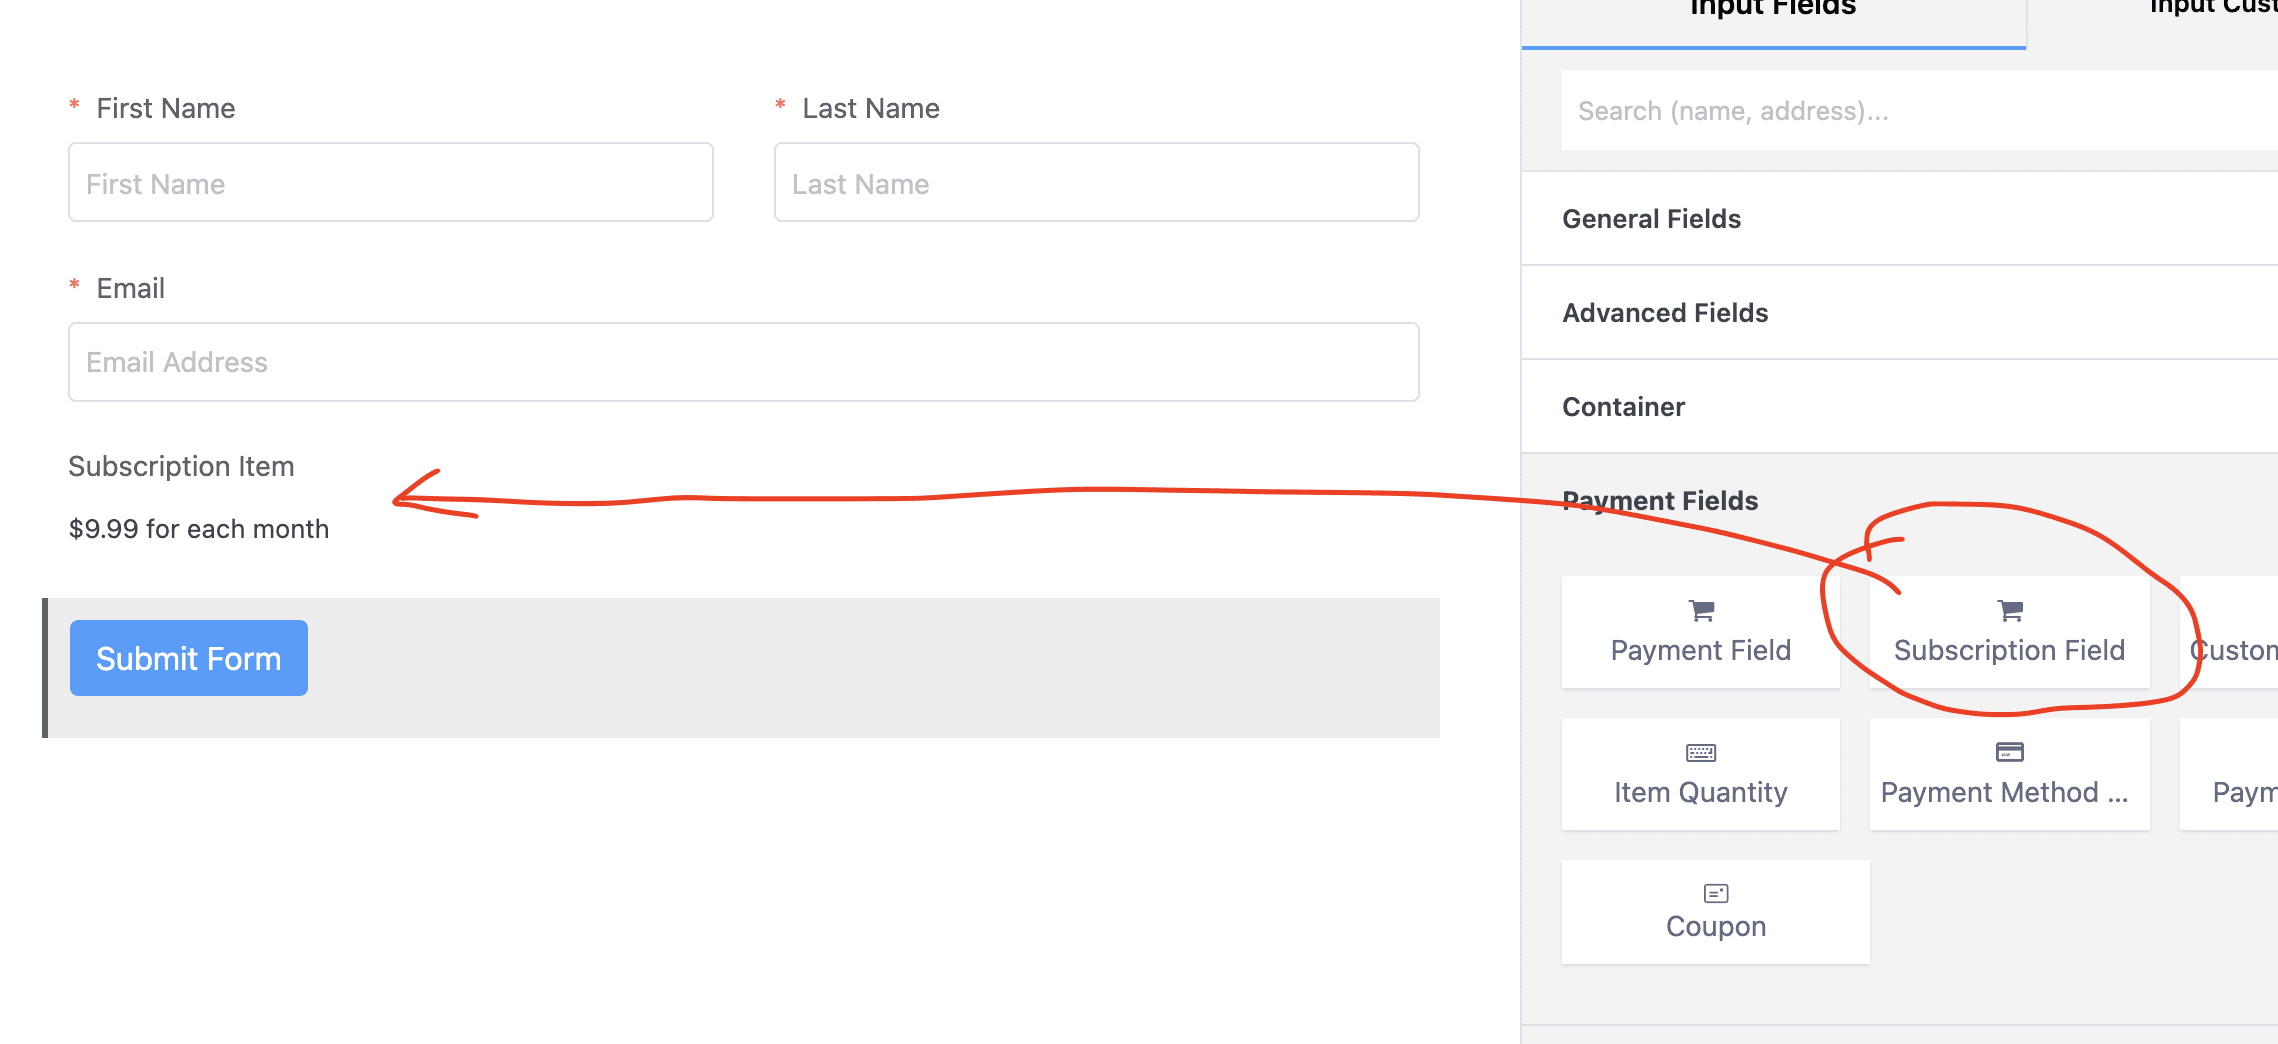
Next, under the “Payment Fields” tab, drag the “Subscription field” over to your form canvas.
Step 5: Configure Your Recurring Payment plan
Select the “Subscription Item” field you dragged over to your form canvas.
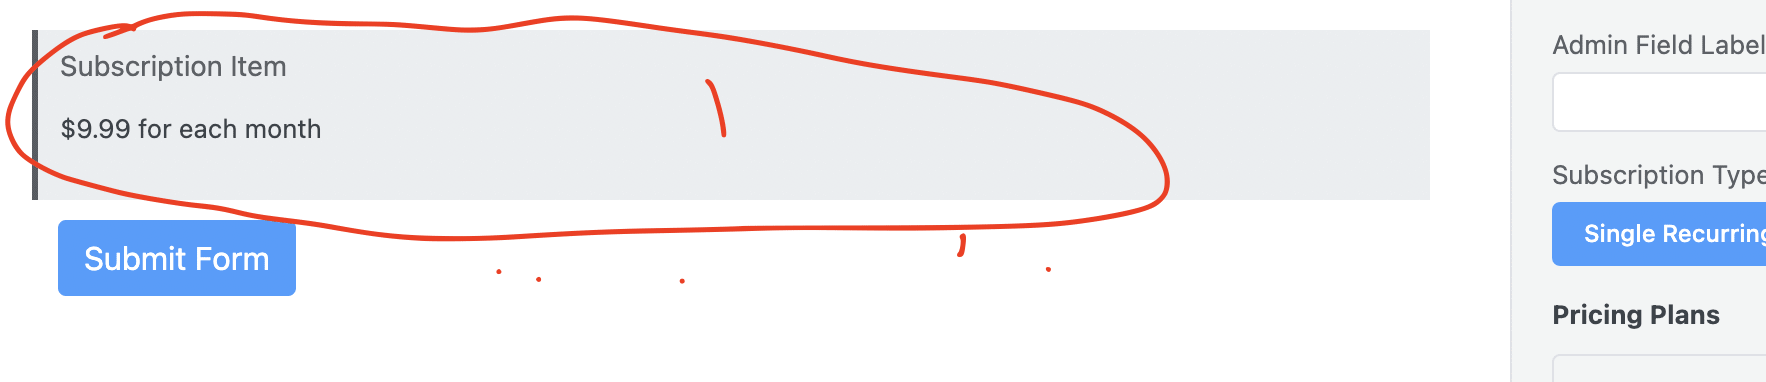
You should see the field “Input Customization” tab (on the right) with all sorts of options to configure your recurring/subscription payment plan.
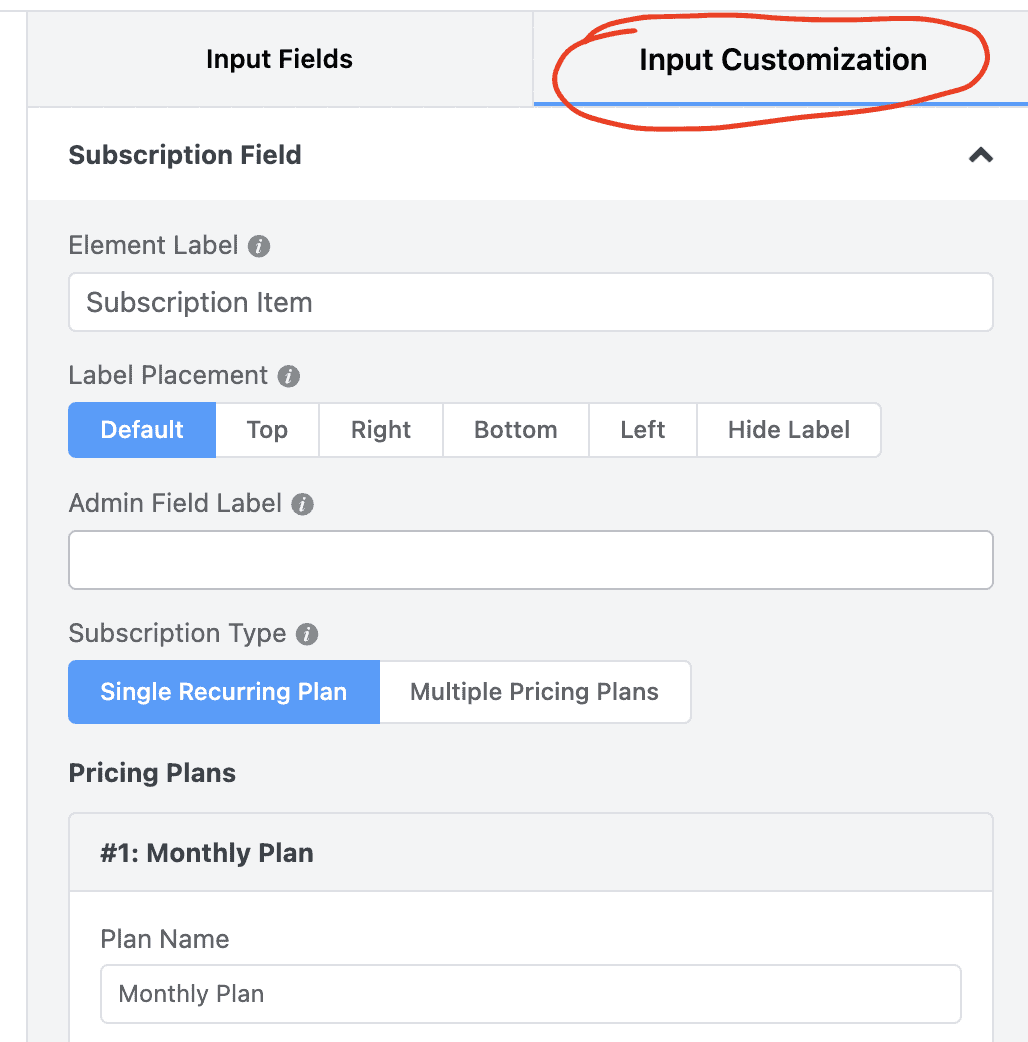
We’re going to keep things simple for this example and configure just one monthly recurring payment plan.
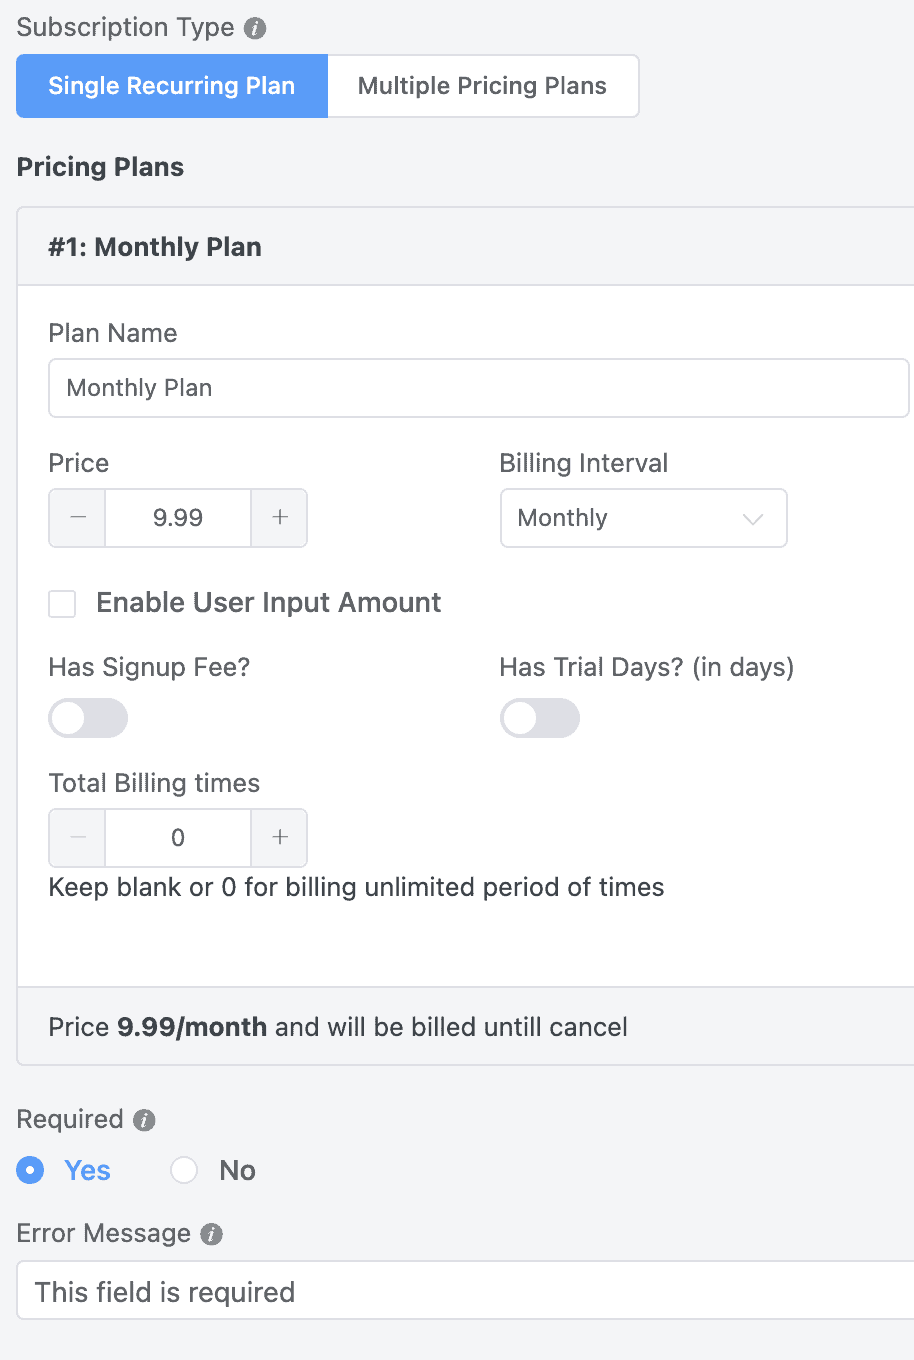
Configure your recurring/subscription plan to your own needs:
- Plan Name = you may change it to “Monthly Membership” for example.
- Price = enter your monthly fee you’ll be charging
- Billing interval = you can leave it at monthly or change it to the appropriate billing frequency you want
- Enable user input amount = this is ONLY if you’re letting users enter any price they want, in most cases you probably don’t want to enable this if you have a set price you will charge
- You can toggle on/off if you want to give new users a free trial or a limited-time trial before the regular recurring billing starts
- Total Billing Times = if it’s a recurring service or product until the customer cancels, leave this at zero
- Set this field to “Required” – Yes
- Save your changes
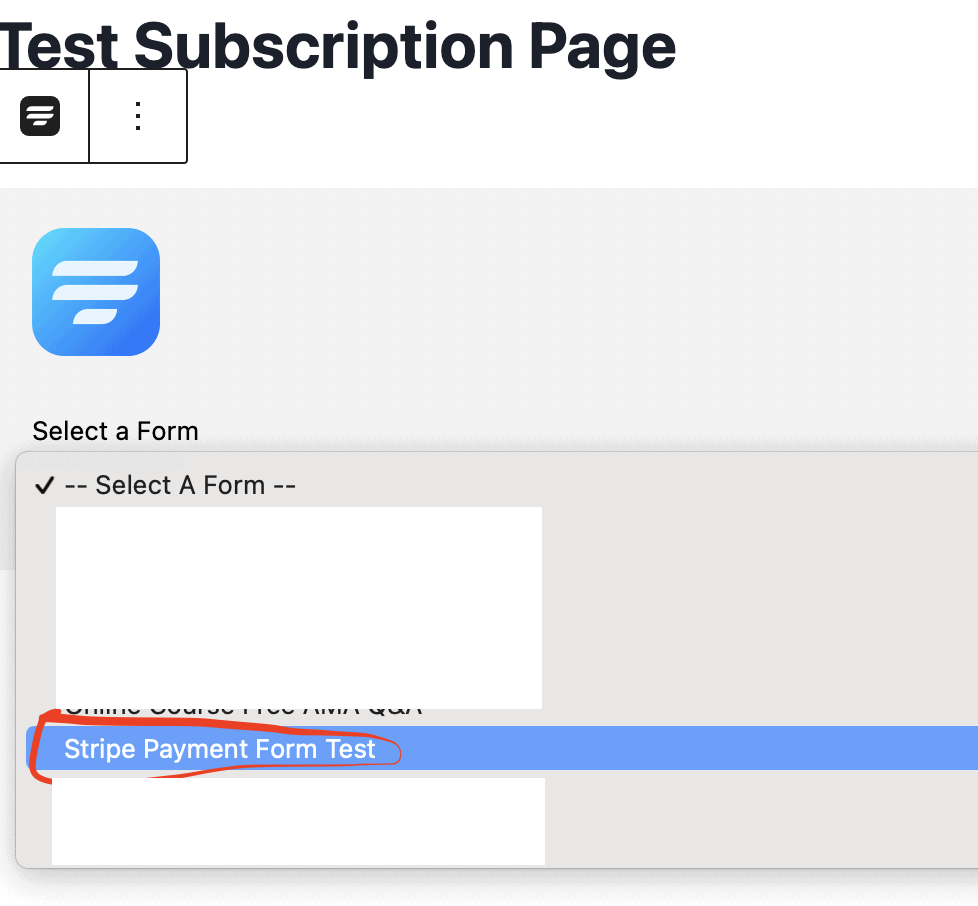
Step 6: Create Your Payment Page
Create your recurring payment or subscription page.
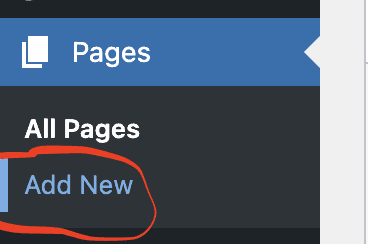
Enter the page title for this page, e.g. Subscription Page.
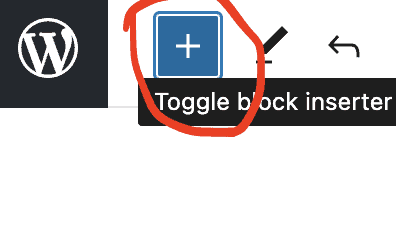
I’m going to keep it simple and use the built-in WordPress Gutenberg blocks to create this page.
Click on the “+” sign to add a new block in Gutenberg.
Search for the Fluent Forms block:
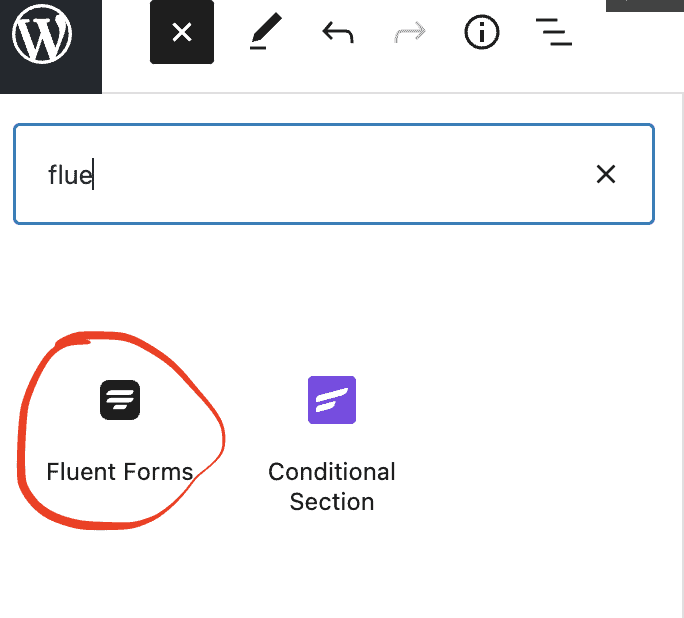
From the Fluent Forms block, you should see a dropdown list of all your Fluent Forms forms. Select your Recurring Payment/Subscriptions form.
You’re Done! Start Taking Recurring Payments!
Now you can preview your payment page, and voila! You can now take recurring payments.
I hope you found this tutorial helpful in starting to receive recurring payments for your business without the need to install and use WooCommerce.
Join Me for Walking Meetings About Creator Businesses
Steve Jobs used to love having walking meetings with his inner circle of friends & colleagues.
Join me each week for “virtual” walking meetings to talk about:
Join me at the Walk with Me (aka Tiny Empires) newsletter.